Tuesday, October 11, 2005
HOWTO: Lego Minifig costume
Two years ago, I decided to make a Lego minifig (ie: "Lego man") costume for Halloween. The hardest part was building the head. Here's how I did it:
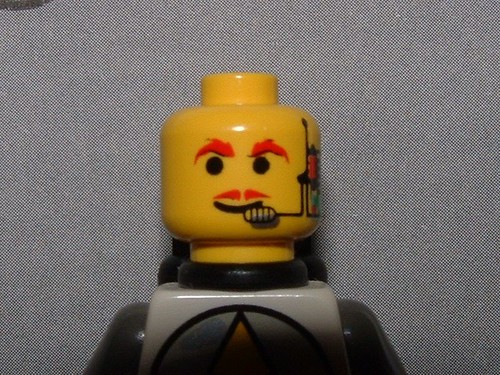
To start, I took some mug shots of an actual minifig. The only minifig I could find was this weird spaceman with facial hair and what appeared to by cyborg implants.
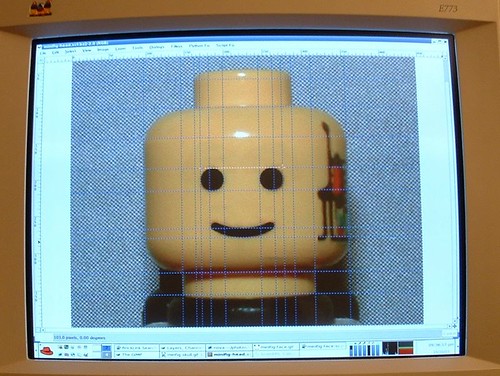
I then cleaned up photo in the GIMP by removing the extraneous features (facial hair, etc.). I just wanted to make a "classic" minifig costume. I then added a bunch of guidelines so I could more easily take measurements.
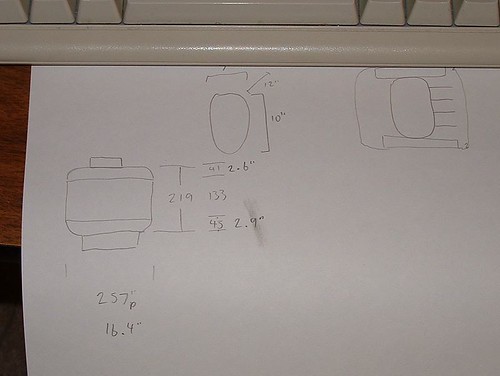
I also measured my head. The distance from the top of my head to the bottom of my chin is about 10 inches. My plan was to make the head out of a stack of styrofoam insulation sheets. Each sheet is 2 inches thick, so five sheets could span the height of my head. Another sheet for the top, and one more for the bottom brings the total number up to seven.
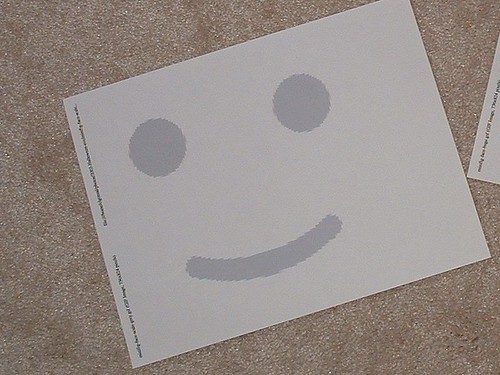
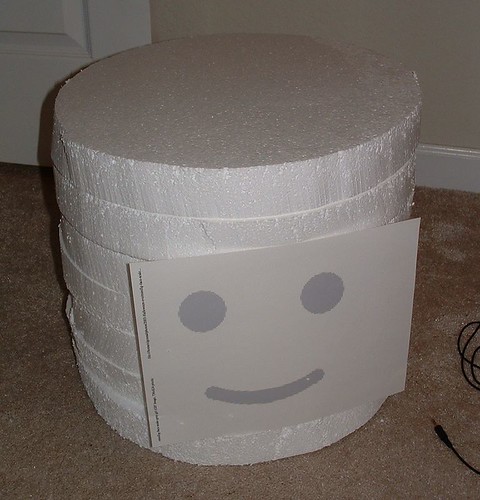
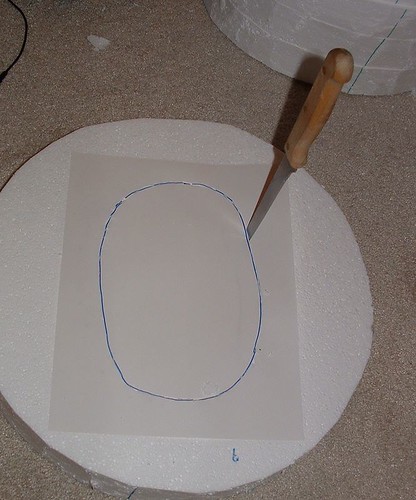
I also printed out the minifig face to the right scale. I actually made two printouts. The first one was just full-page, and then the second one (shown here) was scaled to the right size. (I figured out how much to scale it down based on the size of the first printout) If I had good illustration software which would print at a reasonable scale I probably could've done without the first printout.
This printout will be my template for painting the face later.
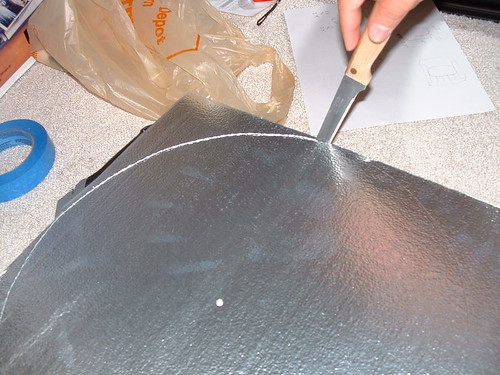
Then I started cutting disks of the right diameter out of the styrofoam sheets. The sheets are 4' x 6', and sell at home depot for about $2.50 each. The sheets I bought were convered in a plasticized-foil layer on one side.
The first disk was traced out by putting a nail in the center, and using a pencil on a string as a home-brew compass. For all of the other disks, I used the first disk as a template.
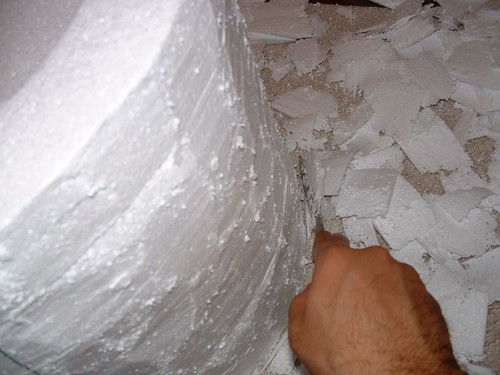
An ordinary steak knife works well for cutting the foam.
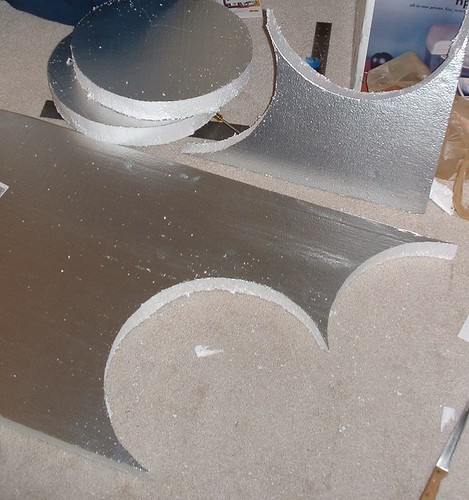
I've cut a few disks so far, and you can see that it's starting to look like it's snowing. Cutting styrofoam makes a huge mess. It's easy to clean with a vacuum, though.
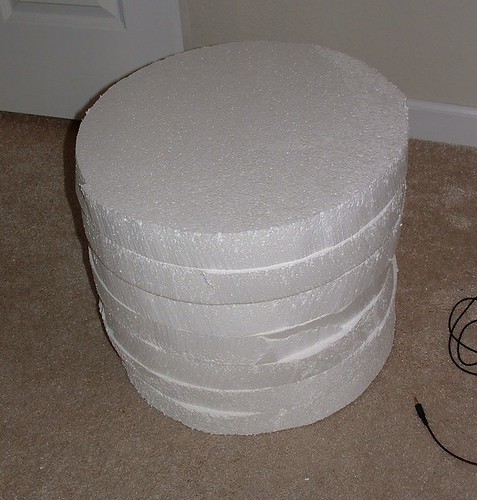
Finally, my 7 styrofoam disks.
To paraphase Michelangelo, "I am merely releasing the minifig from the foam".

I then numbered all of the disks. Number 1 will be the bottom disk, and number 7 will be the top. During construction, it's easiest to have the stack upside down most of the time.
You can also see that I put a couple of lines going down the length of the stack. This was so that I could maintain a consistent alignment between the pieces.
I then cut a circular hole in disk #1 big enough for my head to pass through. When completed, this ring essentially goes around my neck.
I then "shaved" the stack. This was just to remove any large inconsistencies. Later, I'll sand the stack to make it smoother. When "shaving" I made sure not to obliterate my alignment lines.
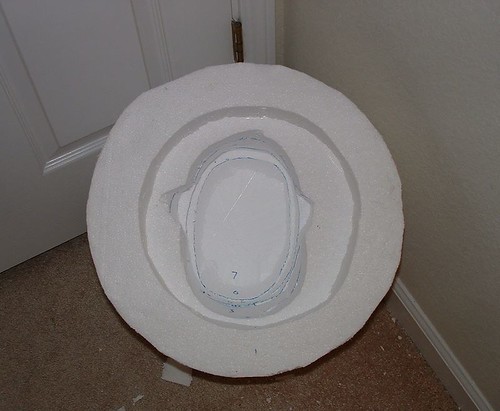
I then traced the top of my head onto a sheet of paper, and then cut that shape into disk #6. (Remember: disk #7 is the one that will rest on top of my head, so it remains a solid disk.)
When cutting this, I angled the knife inward a bit when I first cut out the shape. I then made gradual adjustmets until the disk would fit snugly on the top of my head. I wanted a reasonably snug fit so that the mask would rotate when I turned my head.
Here it is after cutting the holes in all of the layers, and gluing them together. I ended up using hot-glue, which works okay, but is tricky because it hardens so fast that there almost isn't enough time to put the pieces together.
You have to be careful about what sort of glue you use with styrofoam. Anything with a solvent will just disolve the foam. That means contact cement and model airplane glue are out. White glue (aka "Elmer's glue") would probably work okay, but I haven't tried it.
After this step, I forgot to keep taking pictures. The next things that I did were:
- Sanded the outside so that it was smooth. Styrofoam sands very well. I also sanded the top and bottom edges of the resulting cylinder to make them rounded like a minifig. A coarse sanding block made this really easy.
- Made a "stud" and glued it on top. More on the stud in a moment.
- Spray-painted the whole thing yellow, and used the face template to spray paint on the face.
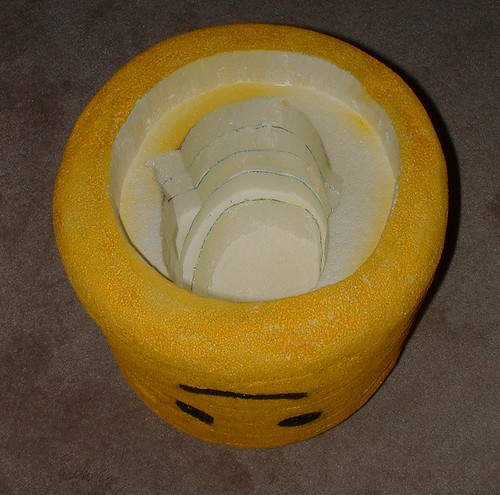
Here it is after all of these steps.
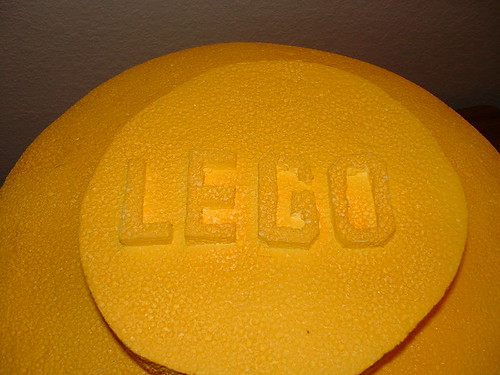
Here's the stud that I put on top. This is just a smaller disk, cut to the correct scale, glued on the top. On a real minifig, this would be a ring (ie: I'd cut a circle of of the middle of it). To make the costume more recognizable to non-Lego fanatics, I instead carved the letters "L E G O" out of styrofoam, and glued those onto the stud. This makes it more like a brick stud than a minifig stud, but when people asked "what are you" I could just show them the top of my head.
I also made eye holes by poking a ball-point pen into the eye spots. I put black acrylic paint into the holes from the outside, so that they wouldn't be very noticable.
If I were going to do this again, I'd want to find a better way to make the eye-holes. Perhaps cutting out the eyes entirely (making 2" diameter holes), and then covering them with black bug screen would work better. With these miniscule eye holes, visibility was terrible.
Using spray paint also turned out to be a mistake. Remember what I said about solvents and styrofoam? Spray paint contains solvents. It still worked, but I needed to be very gentle with the paint. Even then, you can still see some damage, especially around the left eye. It also left the entire thing with a sort of stippled texture, rather than the glossy surface I was originally hoping for.
If I was going to do it again, I'd either use a water based paint, or I'd put some sort of protective coating (maybe a thin layer of plaster of paris, or Future floor wax) on the foam before spray painting it.

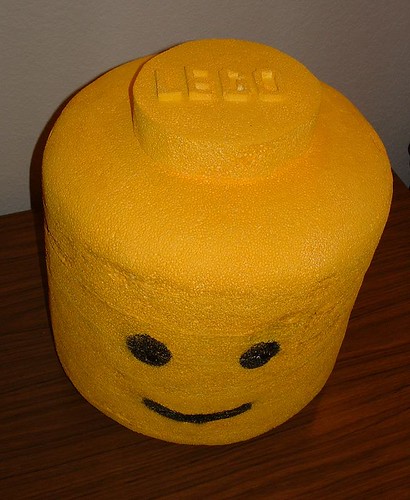
Here's the finished product!
For the rest of my costume I wore a long-sleve baseball T-shirt (to get the effect of different colored arms from legs that many minifig have), wore yellow kitchen gloves, and put some rectangles of carboard in the bottom of my pant legs to make my legs seem "boxy".
The whole costume took me about 4 hours to build. I actually built it all the night before I wore it to the Halloween party at work.
For spraypainting styrofoam, people in the terrain world will sometimes use an airbrush (spraying without the solvents) or paint the surface first with watered down white glue.
Rustoleum now has a water-based spray paint:
http://www.rustoleum.com/brand.asp?frm_brand_id=40&SBL=1
I haven't tried it yet, but it may not eat the foam.
Very cool, though. It turned out great! Are there also pictures of the completed costume (complete with body?)
-Shawn.

Was wondering though, how do you see? Or do you wear it like a hat?
GeeWhiz: the third photo from the end explains how I see. I couldn't see very well, though.As I mentioned above, if I were to do this again I'd put more thought into improving visibility.
I've made a bunch of costumes over the years, and have had issues with the headpiece, always.
One year, i did "Danger Mouse", and the head was paper machie, with frisbees for ears. it worked well, but i could only see my feet.
Another year, I did "Max" from Sam And Max. The ears were ribbed with garden hose. those were way too heavy. But for the head in general, I was looking through his mouth, which was made from that plastic canvas stuff you can find at hobby shops. it worked out really well. I also started the head on a base of a plastic hard hat from Home Depot. It cost $5, and was a great base to mount stuff on. It's really easy to make holes in to affix things to it.

Should I do it again, I think I would choose styrofoam like you. The building foam was a real mess.
You can see pictues at http://www.stavngaard.dk/magnus/fastelavnkloden2005.htm
In the future, instead of styrofoam, you might consider foam rubber. Easier to cut, holds its shape, easy to paint and is flexible.
Great idea for a costume!
Great job.
http://www.facebook.com/photo.php?pid=259844&id=592828147
I covered the interior including the eyeholes in black felt so I wouldn't suck in any pellets by accident :).
After trimming and sanding I put on a layer of joint compound. While the joint compound was still wet, I embedded pieces of wall patch tape across the eyeholes.
I sanded the joint compound smooth, then painted it with acrylic model paint (took 4 bottles of testor's Chrome Yellow Acryl to cover).
To do the hands I took a 6" piece of 6" dia. PVC pipe and cut the hand shape out, then glued a 10" piece of 4" pipe to that. I glued a piece of 3/4" pipe on the inside of the 4" pieces to use as a hand hold.
The result can be seen here with a couple of construction pics at here

dalocalhawaiian: the body you made is really impressive! Wow!
critter42: The wall patch tape for the eye holes is a great idea, as is embedding it into the spackle. I also like the way you used the PVC pipe to make the hands.
pasembur/xumb: your party photos are great! A Lego man always adds life to a party. :-)
My hands actually fit into the lego hands so I had complete control over their rotation. I also put a hole in the right hand so that my real hand could pass all the way through to enjoy a beer or two. I covered it up with some stretchy material that had a single slit so that it was pretty much closed when my hand was inside. And it was spray painted the same color. The hands were also completely made of posterboard with a little bit of styrofoam in there for support.
I also did use styrofoam in the head, mainly for the top and bottom curved areas to really give it a lego look. It's all about the details. Since the styrofoam doesn't take paint well, I covered those areas with duct tape. One thing though, spray paint can scratch off duct tape. It takes a rather serious scratch, but none the less that gray will show up. Next time, I'll use yellow duct tape for those areas. You also can't see it, but I put a vent at the top of the head to get more air circulation. Used some plain screen that was spray painted yellow. Now I'm just rambling on so I'll probably post a how-to sometime when I get the chance.
It did survive the whole night that involved some rather rough drunk friends and a light drizzle, so I'll be using it again next year, but wearing a different outfit, and probably with another lego buddy.
Fantastic Costume BTW:)
Two variations on this:
You could also try wearing a Lego T-shirt over a long-sleeved shirt. In some ways les realistic (I don't think any minifigs have Lego logos on their bodies), but helps clue people in more.
Another option might be to get a Go Miniman Go T-shirt, which has the body (but not the head) of a Lego minifig printed on the front. I'm not sure if those shirts are still available, though.
What I did differently:
1. To glue my rings I used good old fashioned Elmer's white glue. This worked fine. I also decided that I didn't want to tackle spray paint-(mess + drying time) so instead I used Yellow Duct Tape. My thought was the tape would also act to stabalize the glue in the event it didn't hold well.
2. I cut a large opening for the mouth- this is what we are using to see (and breathe) as in the original visibility seemed to be a factor. 3. After I had the opening cut, I ran the tape across the top flat part of the head. After covering the top, I then went in circles working from the top down to the bottom.
4. I added a 1/2 a ring for a neck. My son wouldn't go without a neck. Couldn't make a full ring, b/c it would be too tight to squeeze the head into the unit. I also made the round ring for the top of the head. Duct taped both and I hot glued onto the head. I thought hot glue would hold better on the duct tape.
5. For the eyes and mouth- I bought clear plastic mesh canvas from Michaels. I cut out shapes for the eyes and mouth, then used a black sharpie to color them and I hot glued them to the head. The eyes are glued onto it without any holes underneath. The smile has a large smile shaped cutout underneath that we are using to see and for air.
Other helpful hints. Keep a shop vac handy!!!! I did not have to 'sand' my styrafoam. Instead I I used a seraded drywall utility knife which easily sliced through it and once I had my rings glued together, I used the knife to just chafe and even out and to round out the top and lower rings. The duct tape is glossy yellow so it has a very nice shine to it. Easy to work with, you can do that inside your home. I bought some black tulle to cover the plastic mesh eyes/mouth, but I discovered it wasn't needed.
The styrafoam from Home Depot- was a 6x8 sheet for $15 ( have plenty left for next year). The plastic mesh canvas was .49 cents for the sheet, the duct tape was $3.34 from Walmart. I aleady had a sharpie and glue. I knocked this out in just a few hours.
Now a big time saving hint- if spending some money doesn't matter- Michaels sells already made stryafoam rings, plus rounded rings for the top and bottom and full circles for the top nub. There would be no mess with cutting- you can jump right to the gluing- BUT- the convenience comes at a price- each ring was $6.99- I was too cheap to do that.:) Plus, I do like the feeling you get when you make it all yourself.
Overall, my son LOVES it. My husband thinks it's my best yet. Since it din't take long- tomorrow I am going to knock out a pair of hands- using my extra styrafoam and duct tape!
Thanks so much for sharing your wonderful costume and you How To Instructions. My son wouldn't have had the costume he wanted without it!
Just a note to say thanks for the hints for making the heads - I don't think I ever mentioned - we used this as the basis of our costumes in 2007 for our lego costumes, and I just got around to creating a blog post for them:
http://bit.ly/lego_costume
Same basic styrofoam idea, with some tweaks and additions!
thanks again,
tim
I also like the way you did a sort of "mash up": Lego minifig + wedding couple. The Lego flowers are hilarious.
http://i49.tinypic.com/2u9sg8p.jpg
oops