Tuesday, October 11, 2005
HOWTO: Lego Minifig costume
Two years ago, I decided to make a Lego minifig (ie: "Lego man") costume for Halloween. The hardest part was building the head. Here's how I did it:
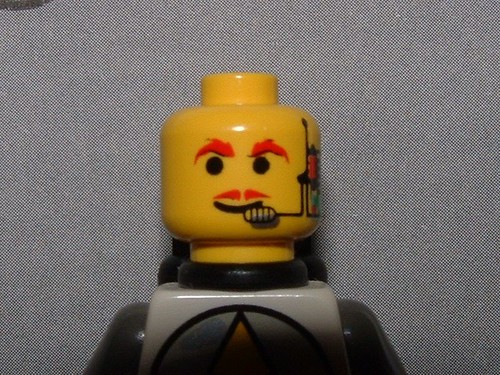
To start, I took some mug shots of an actual minifig. The only minifig I could find was this weird spaceman with facial hair and what appeared to by cyborg implants.
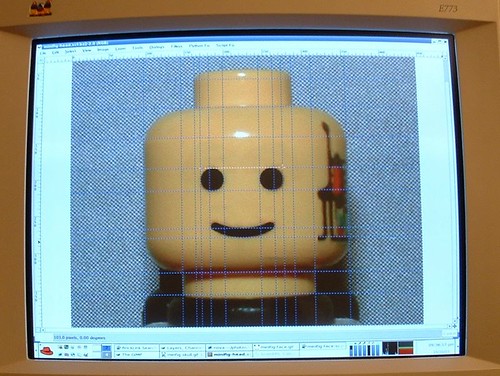
I then cleaned up photo in the GIMP by removing the extraneous features (facial hair, etc.). I just wanted to make a "classic" minifig costume. I then added a bunch of guidelines so I could more easily take measurements.
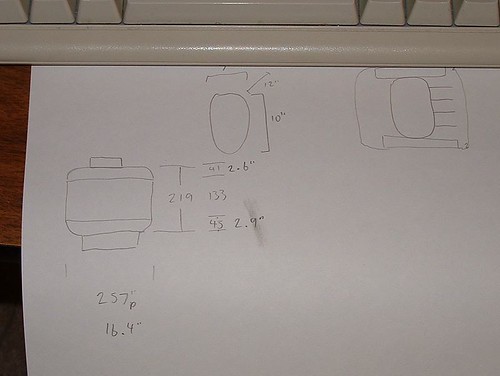
I also measured my head. The distance from the top of my head to the bottom of my chin is about 10 inches. My plan was to make the head out of a stack of styrofoam insulation sheets. Each sheet is 2 inches thick, so five sheets could span the height of my head. Another sheet for the top, and one more for the bottom brings the total number up to seven.
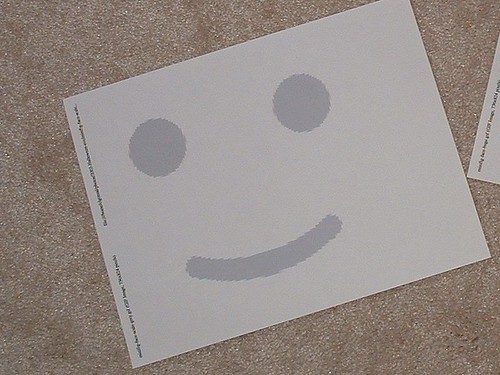
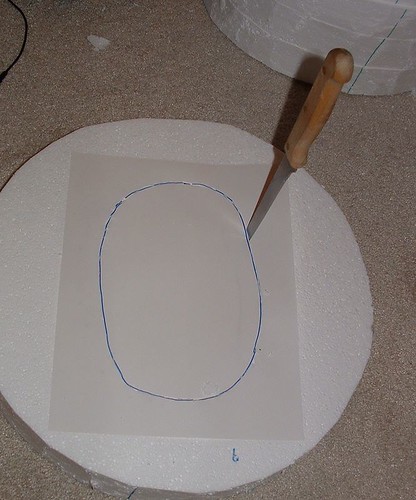
I also printed out the minifig face to the right scale. I actually made two printouts. The first one was just full-page, and then the second one (shown here) was scaled to the right size. (I figured out how much to scale it down based on the size of the first printout) If I had good illustration software which would print at a reasonable scale I probably could've done without the first printout.
This printout will be my template for painting the face later.
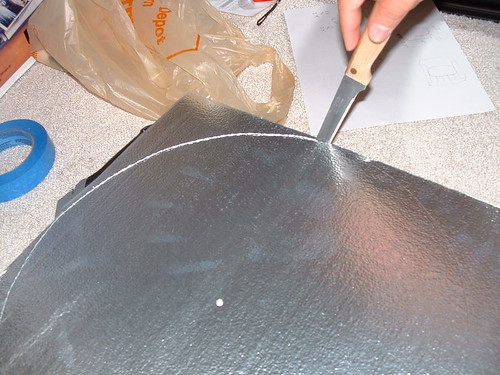
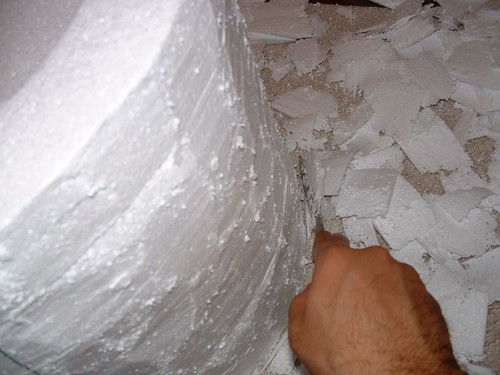
Then I started cutting disks of the right diameter out of the styrofoam sheets. The sheets are 4' x 6', and sell at home depot for about $2.50 each. The sheets I bought were convered in a plasticized-foil layer on one side.
The first disk was traced out by putting a nail in the center, and using a pencil on a string as a home-brew compass. For all of the other disks, I used the first disk as a template.
An ordinary steak knife works well for cutting the foam.
I've cut a few disks so far, and you can see that it's starting to look like it's snowing. Cutting styrofoam makes a huge mess. It's easy to clean with a vacuum, though.
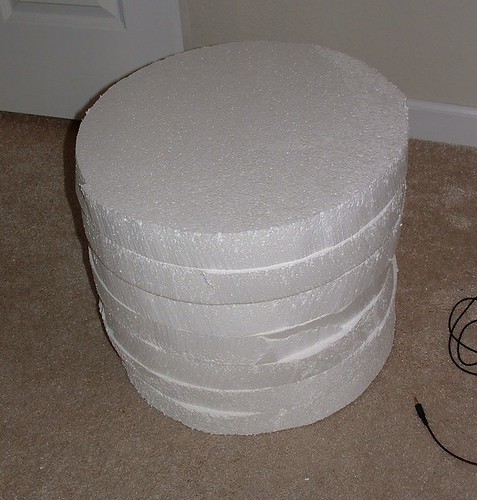
Finally, my 7 styrofoam disks.
To paraphase Michelangelo, "I am merely releasing the minifig from the foam".

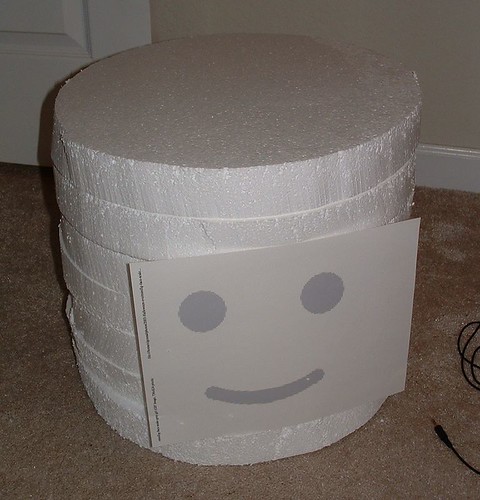
I then numbered all of the disks. Number 1 will be the bottom disk, and number 7 will be the top. During construction, it's easiest to have the stack upside down most of the time.
You can also see that I put a couple of lines going down the length of the stack. This was so that I could maintain a consistent alignment between the pieces.
I then cut a circular hole in disk #1 big enough for my head to pass through. When completed, this ring essentially goes around my neck.
I then "shaved" the stack. This was just to remove any large inconsistencies. Later, I'll sand the stack to make it smoother. When "shaving" I made sure not to obliterate my alignment lines.
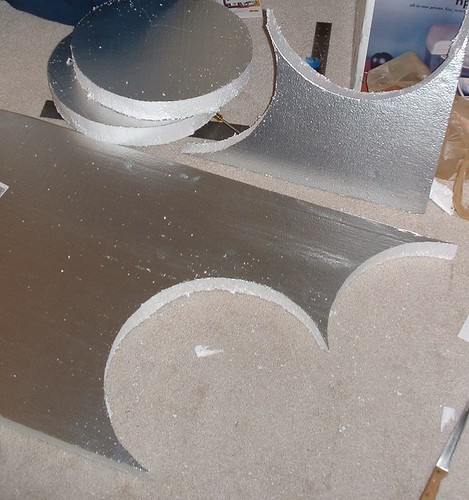
I then traced the top of my head onto a sheet of paper, and then cut that shape into disk #6. (Remember: disk #7 is the one that will rest on top of my head, so it remains a solid disk.)
When cutting this, I angled the knife inward a bit when I first cut out the shape. I then made gradual adjustmets until the disk would fit snugly on the top of my head. I wanted a reasonably snug fit so that the mask would rotate when I turned my head.
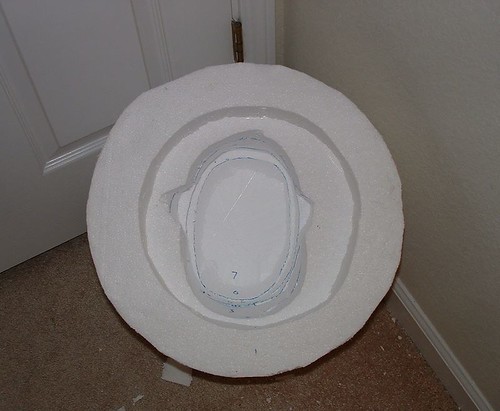
Here it is after cutting the holes in all of the layers, and gluing them together. I ended up using hot-glue, which works okay, but is tricky because it hardens so fast that there almost isn't enough time to put the pieces together.
You have to be careful about what sort of glue you use with styrofoam. Anything with a solvent will just disolve the foam. That means contact cement and model airplane glue are out. White glue (aka "Elmer's glue") would probably work okay, but I haven't tried it.
After this step, I forgot to keep taking pictures. The next things that I did were:
- Sanded the outside so that it was smooth. Styrofoam sands very well. I also sanded the top and bottom edges of the resulting cylinder to make them rounded like a minifig. A coarse sanding block made this really easy.
- Made a "stud" and glued it on top. More on the stud in a moment.
- Spray-painted the whole thing yellow, and used the face template to spray paint on the face.
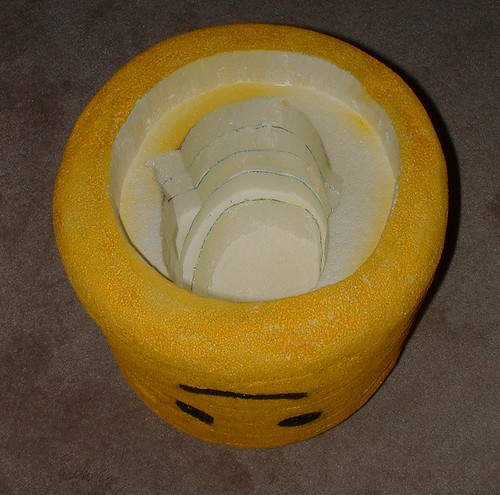
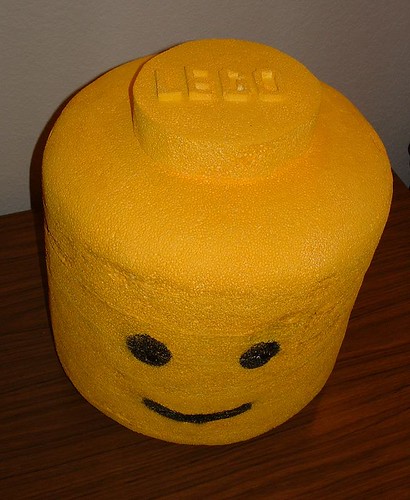
Here it is after all of these steps.
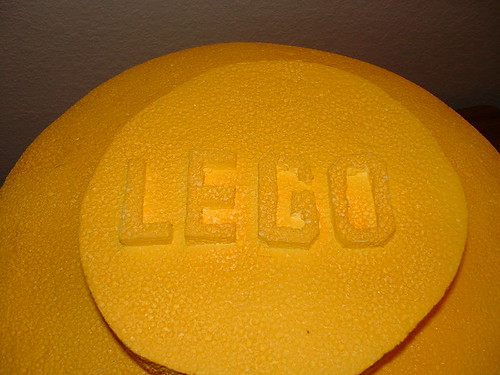
Here's the stud that I put on top. This is just a smaller disk, cut to the correct scale, glued on the top. On a real minifig, this would be a ring (ie: I'd cut a circle of of the middle of it). To make the costume more recognizable to non-Lego fanatics, I instead carved the letters "L E G O" out of styrofoam, and glued those onto the stud. This makes it more like a brick stud than a minifig stud, but when people asked "what are you" I could just show them the top of my head.
I also made eye holes by poking a ball-point pen into the eye spots. I put black acrylic paint into the holes from the outside, so that they wouldn't be very noticable.
If I were going to do this again, I'd want to find a better way to make the eye-holes. Perhaps cutting out the eyes entirely (making 2" diameter holes), and then covering them with black bug screen would work better. With these miniscule eye holes, visibility was terrible.
Using spray paint also turned out to be a mistake. Remember what I said about solvents and styrofoam? Spray paint contains solvents. It still worked, but I needed to be very gentle with the paint. Even then, you can still see some damage, especially around the left eye. It also left the entire thing with a sort of stippled texture, rather than the glossy surface I was originally hoping for.
If I was going to do it again, I'd either use a water based paint, or I'd put some sort of protective coating (maybe a thin layer of plaster of paris, or Future floor wax) on the foam before spray painting it.

Here's the finished product!
For the rest of my costume I wore a long-sleve baseball T-shirt (to get the effect of different colored arms from legs that many minifig have), wore yellow kitchen gloves, and put some rectangles of carboard in the bottom of my pant legs to make my legs seem "boxy".
The whole costume took me about 4 hours to build. I actually built it all the night before I wore it to the Halloween party at work.
Sunday, October 09, 2005
Google Reader
It's nice to finally be able to tell people what I've been working on for the past few months: Google Reader.
The feedback I've seen about Reader has been pretty interesting. A lot of people really like it, which is always great to hear.
Of course, some people aren't so happy. A lot of these people seem to be a bit confused by how different Reader is from the feed readers they're used to. It would've been a lot easier for us to create a clone of some other feed reader, but we wanted to do something better. Unfortunately, there's a danger with any innovation: doing something that's different, even if it's better, means is that people have to unlearn old habits.
That isn't to say that we think Google Reader is perfect as it is. It's very much a work in progress. (that's why it's on Google Labs, by the way) As Mihai mentions, "the ideal feed reader user interface still hasn't been discovered".
In any case, we plan on making many improvements in the days ahead, and we hope you'll keep sending us suggestions.